Web Speed Testing 101
First impressions are everything when it comes to your website visitors. With short attention spans and a fast-paced society, people want information fast. If your website is sluggish and takes more than a few seconds to load, most users will click away. It’s time for a website speed test.
According to a Brand Perfect research report, 51 percent of shoppers report that the primary reason they abandon a purchase is because of slow loading time. In fact, searchers will opt for a competitors site over yours if the competitor’s site loads a mere 250 milliseconds (one-fourth of a second) faster than yours. Site performance and speed is paramount.
Before delving into the methods of site speed optimization, you need to evaluate where your site currently stands. There are numerous websites and tools available that test site speed, such as Google’s PageSpeed Insights and GTmetrix. To demonstrate the methods used in this article, we will use a recently developed small business website, Your End of Life Doula, as a case study. Before optimizing site speed, we ran a performance check on GTmetrix. This is how the site fared:

For the purposes of improving site speed, the two figures on which we will focus our analysis are the PageSpeed Score and the Page Load Time. As you can see, for this site, the page load time was below average and the PageSpeed Score had room for improvement. Fortunately, there are dozens of relatively painless ways to increase the speed of a WordPress site. Below, we will discuss simple methods of improving the four most common culprits of website sluggishness: ill-defined browser caching, javascript loading issues, poorly optimized images, and dirty databases.
1: Leverage Your Browser Caching
As you know, browsers store information in a cache every time a user visits a site. This helps retrieve information faster with subsequent visits. You can improve your site’s speed by leveraging your browser cache. Leveraging essentially means that, as a web developer, you tell browsers how long to store the information.
Doing this requires little more than a copy and paste. In your file manager, open up your .htaccess file and paste the following code at the top, and save the changes:
## EXPIRES CACHING ##
<IfModule mod_expires.c>
ExpiresActive On
ExpiresByType image/jpg “access 1 year”
ExpiresByType image/jpeg “access 1 year”
ExpiresByType image/gif “access 1 year”
ExpiresByType image/png “access 1 year”
ExpiresByType text/css “access 1 month”
ExpiresByType application/pdf “access 1 month”
ExpiresByType text/x-javascript “access 2 days”
ExpiresByType application/x-shockwave-flash “access 1 month”
ExpiresByType image/x-icon “access 1 year”
ExpiresDefault “access 2 days”
</IfModule>
## EXPIRES CACHING ##
That should take care of most of your files. You can add additional parameters or change the values to suit your needs.
2: Defer Parsing of JavaScript
When a page is loading, it must stop and parse every JavaScript presented. The page will not display until all the scripts are loaded, which can significantly slow your load time. The solution to this common problem is simply to defer scripts until they need to be executed. You can easily defer unneeded scripts by placing them in the footer, rather than leaving them in the header, where they are usually placed by default. Doing so will reduced your initial page load time. To defer you javascripts on your WordPress site, paste the following code at the end of your functions.php file:
// Defer Javascripts
// Defer jQuery Parsing using the HTML5 defer property
if (!(is_admin() )) {
function defer_parsing_of_js ( $url ) {
if ( FALSE === strpos( $url, ‘.js’ ) ) return $url;
if ( strpos( $url, ‘jquery.js’ ) ) return $url;
// return “$url’ defer “;
return “$url’ defer onload='”;
}
add_filter( ‘clean_url’, ‘defer_parsing_of_js’, 11, 1 );
}
Note, you might need to address and defer third-party scripts individually (e.g., YouTube videos), but the above code should take care of most general needs.
3: Optimize Your Images
Many sites are sloth-like simply because the images are too large, improperly sized or served, or lack width and/or height attributes. There is a simple plugin you can use to optimize your images: EWWW Image Optimizer. This plugin will automatically optimize your new uploads, and you can use the Bulk Optimize options to optimize the images and other files already in your library.

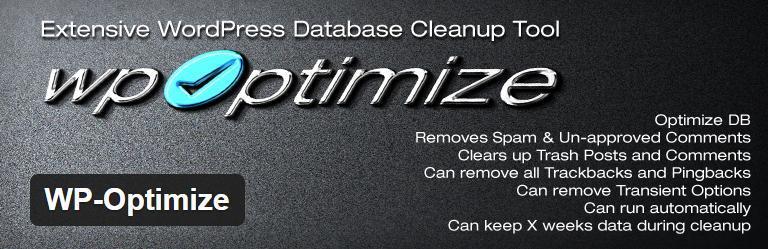
4: Clean up Your Database
You might not be aware, but every time you edit or update a page or post, WordPress stores the revision in your MySQL database. Over time, these extra revisions can bog down your site, especially if you are one to click “update” often while drafting your posts. To clean up your database in seconds, you can install and run the WP-Optimize plugin. Not only will it delete your post revisions and optimize your tables, but you can also opt to have the plugin delete spam comments, trackbacks, and pingbacks.
After using the above tactics, look at how much we improved the speed and performance of our case study site:

We reduced our page load time to a mere 4.4 seconds and we improved our PageSpeed Score to honor roll status, not to mention the fact that we reduced our page size dramatically without any loss in quality or performance.
After optimizing your site, do not forget to periodically run a performance test and address any issues that may arise. Website speed testing is not a one time thing, so keep checking your site!
[DISCLAIMER: The codes above may not work for all sites. Also, Medium Well is not affiliated with these plugins and cannot specifically vouch for them. Always back up your site prior to installing any new plugins or modifying any core files.]